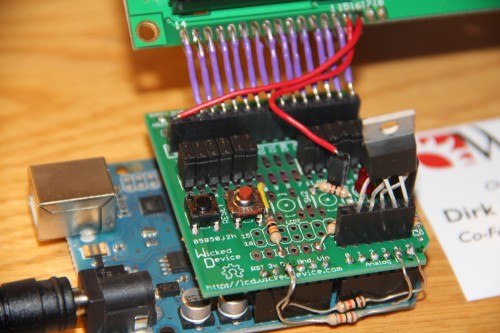
It’s LCD mania! Following my review of the Lumex 16×2 Character LCD from element14 and my recent tutorial on interfacing an Arduino with an LCD display, I have one more LCD-related post up my sleeve. WickedDevice, a small open source hardware company based in Ithaca, NY, sent me their LCD Arduino Shield to evaluate. You can check out my full analysis after the break (both written and in a video!)…
In short, I found the kit to be a pretty easy way to add LCD capabilities to your Arduino. I was able to replicate the temperature monitoring circuit from my last LCD Arduino tutorial, while making it signifigantly more compact than the original breaboard design (see the picture above). I did have to slop some voltage dividing and pullup resistors on the shield to get it to do everything I wanted, and to interface with my non-standard LCD backlight. Thankfully, the board had sufficient breakout area to accomodate this without an issue. It even has room for three additional buttons which gives you the power to turn it into a simple interface board.
I’d like to see Wicked Device release a version of this board with the LCD already built it. It would allow them to eliminate several components, including the crazy jumper system that allows you to connect LCDs with different pin configurations. It would also allow you to end up with a more “polished-looking” final product. But, this version of the board does accomplish their compatibility goal while keeping cots to a minimum.
While putting this board together, I went to their instructional page to check out the board designs and schematics (which should be available since it is an open source hardware board), and was unable to find them. Upon notifying them, they uploaded them right away, and you can go grab them now (Cadsoft Eagle Format). While I was impressed by how quickly they responded and uploaded the files, I was a bit dismayed that they had released an open hardware project without ensuring that the design files were easily accessible online – one of the key requirements for defining your work as open source hardware. Kudos to WickedDevices for uploading it when I asked, but it should have already been there. The same goes for their other open hardware projects, many of which do not include direct links to the design files. The instructions and assembly pictures were top notch, and highly appreciated while I was putting the board together.
All and all, I’d say this is a great shield to pick up for your arduino if you want a cheap, easy, and compact way to add an LCD Display.


1 comment
Hey thank you for doing this awesome set of tutorials by the way. I found a video where the oC symbol was put on the screen by this code here. Link to videohttp://m.youtube.com/watch?v=zmOc7oATtiY. CODE LCD.print(char(223)); I wondered if this would have worked in this case.